Workflow Deployment
In this section, we will provide guidance on how to deploy workflows as a “Workflow Developer” in eFlows4HPC. A “Workflow Developer” is responsible for defining and deploying workflows that can be triggered by “end-users” through the HPCWaaS API.
The main interaction for a workflow developer is with Alien4Cloud, where TOSCA applications and associated TOSCA workflows are defined. In this guide, we will utilize the TOSCA Topology Template feature in Alien4Cloud to create an application from a pre-existing template and configure it to meet our specific needs prior to deployment. Upon deployment, we will cover how to test workflows, as well as expose the application to the HPCWaaS API for end-user access.
Create an application from a Topology Template
Figure 22 shows how to create an application from a topology template.
Log in to Alien4Cloud and navigate to the Applications tab. Click on the
New Application button, provide a unique name for the application, and then switch to the Topology Template tab under the
Initialize topology from section. Select the desired topology template and click the Create button.
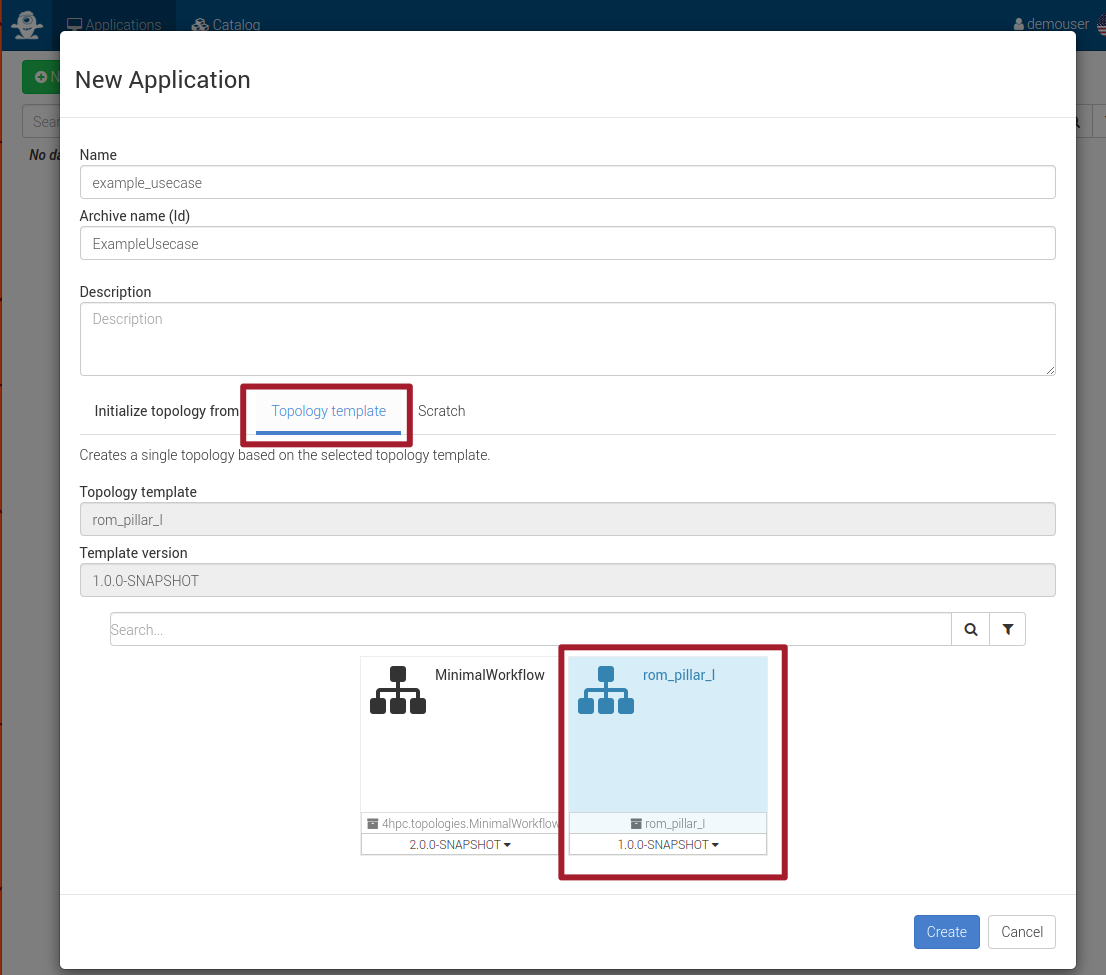
Figure 22 Create an application from a Topology Template
Configure the application before deployment
To prepare for deployment, navigate to the Environment section under Work on an Environment (see Figure 23).
Then click on Prepare next deployment (see Figure 24)
and select the proposed location (see Figure 25).
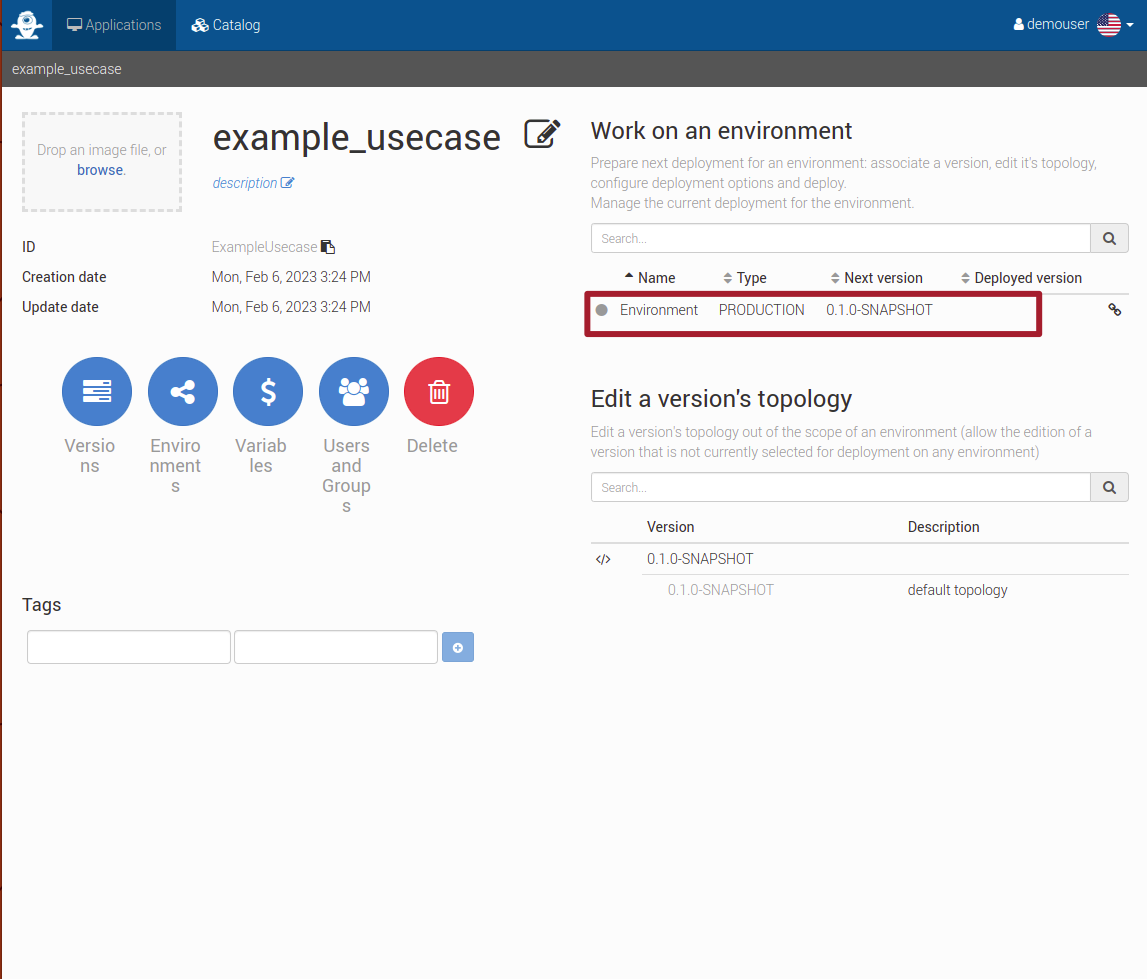
Figure 23 Select the environment
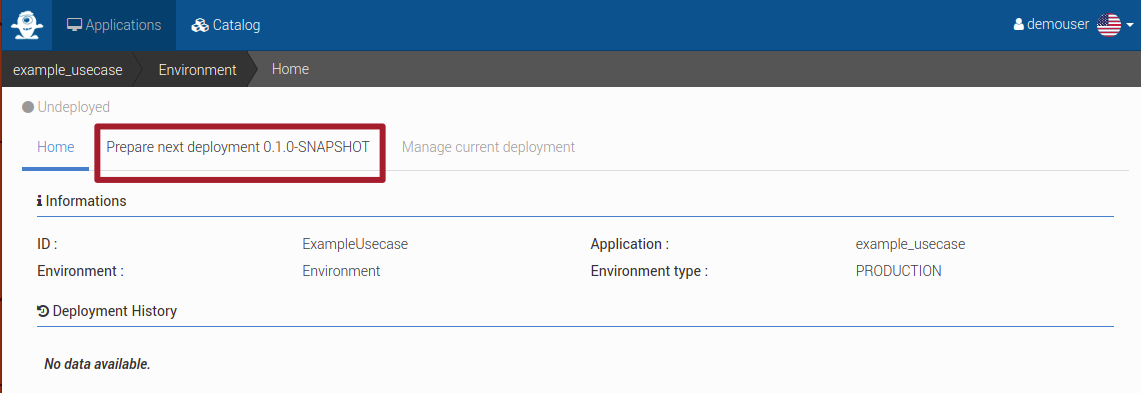
Figure 24 Prepare next deployment
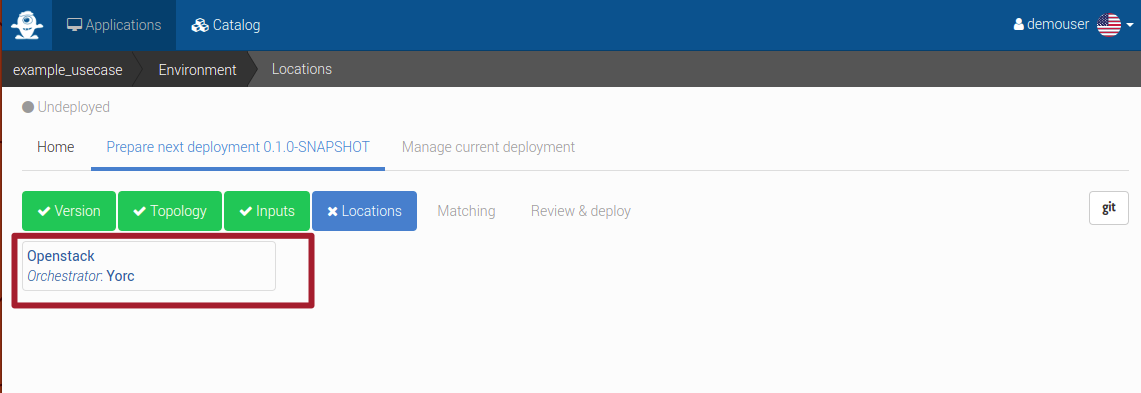
Figure 25 Select location
Under the Topology tab, you can examine the TOSCA topology created from the template and make any necessary modifications.
In most cases, this step is not required as the topology is designed to be configurable through defined inputs.
Access the Inputs tab and fill all necessary inputs (see Figure 26). Note that the information bubble provides additional input description.

Figure 26 Fill deployment inputs
It is important to understand that these inputs are fixed properties that will be selected prior to deployment and cannot be altered for a specific workflow execution. To do this workflows can be defined with their own specific inputs.
Next, under the Matching tab (see Figure 27), you should match abstract TOSCA components to their concrete implementations.
This enables the definition of reusable topologies and facilitates their adaptation to target specific HPC clusters, such as the login
node address or the PyCOMPSs modules to be loaded for job execution.
To do this, click on the Nodes matching tab and expand the AbstractEnvironment node.
Finally, select the desired concrete implementation for the execution environment.
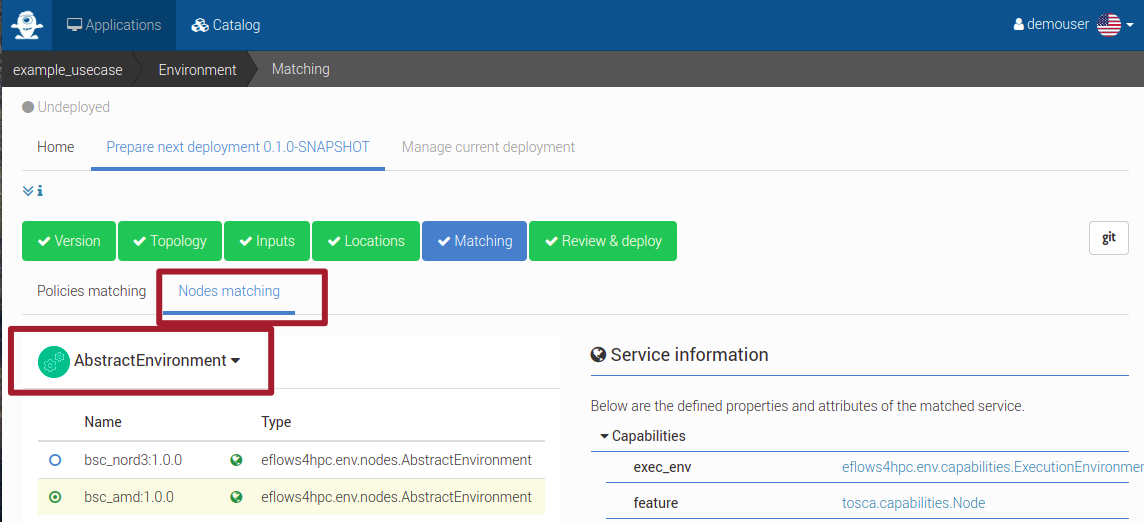
Figure 27 Match abstract components to concrete implementations
Deploy an application
To finalize the deployment process, navigate to the Review and deploy tab (see Figure 28). Carefully review the configurations made in previous sections and,
if satisfactory, click the Deploy button.

Figure 28 Deploy application
You will be automatically redirected to the Manage current deployment tab (see Figure 29).
Here, you can monitor the progress of the deployment.
For more comprehensive insights, you may access the Workflow (see Figure 30)
or Logs (see Figure 31) tabs.
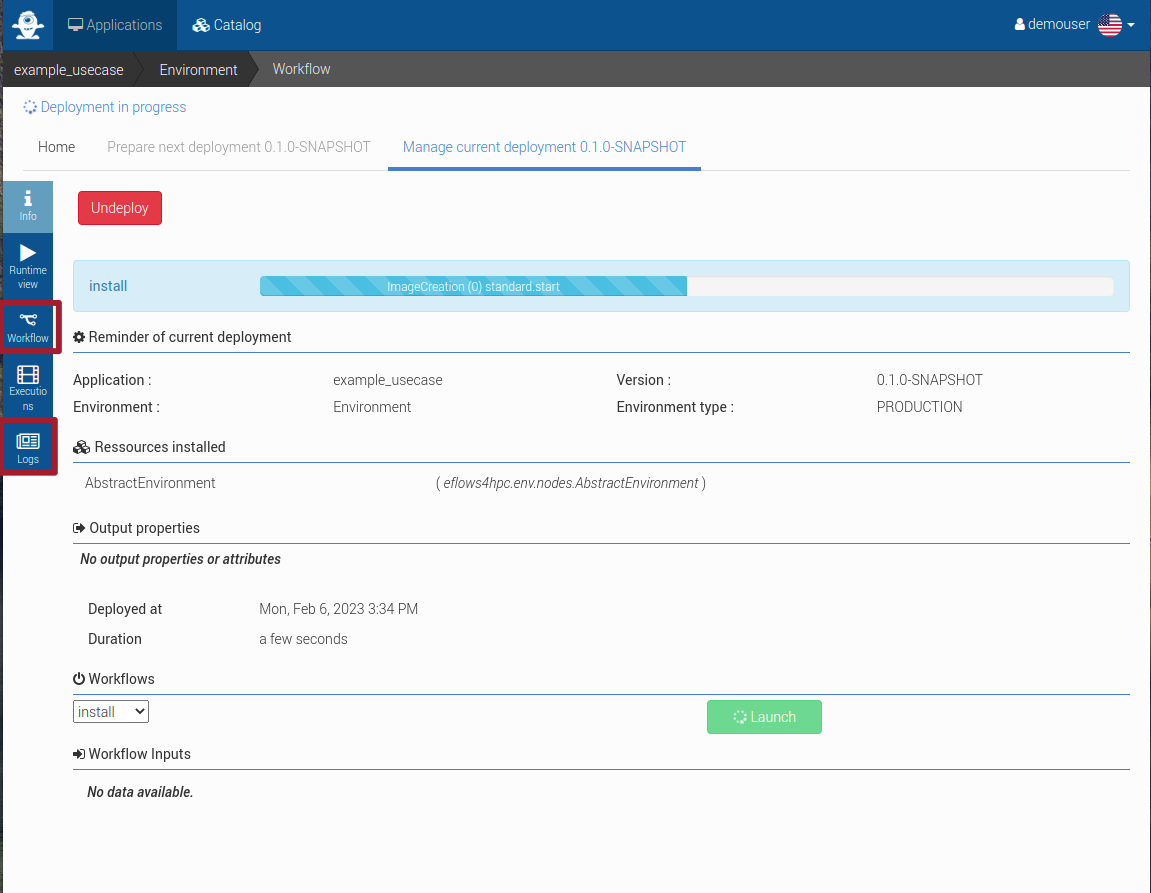
Figure 29 Deployment of an application
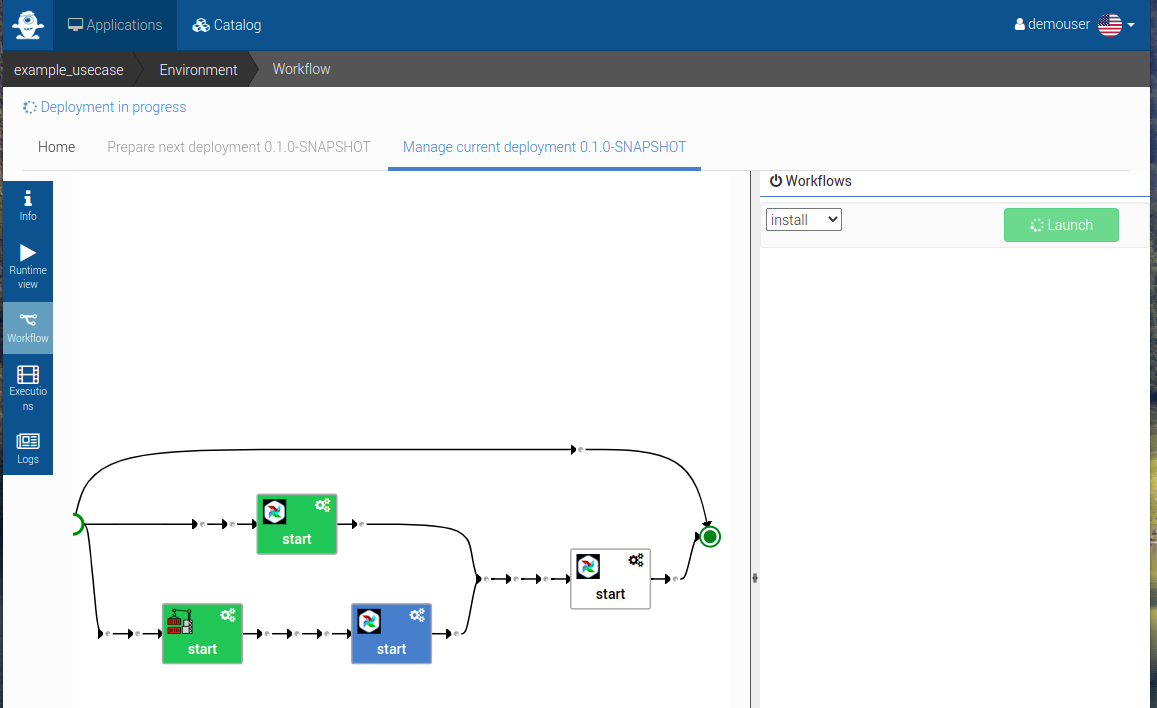
Figure 30 Workflow view of a deployment of an application
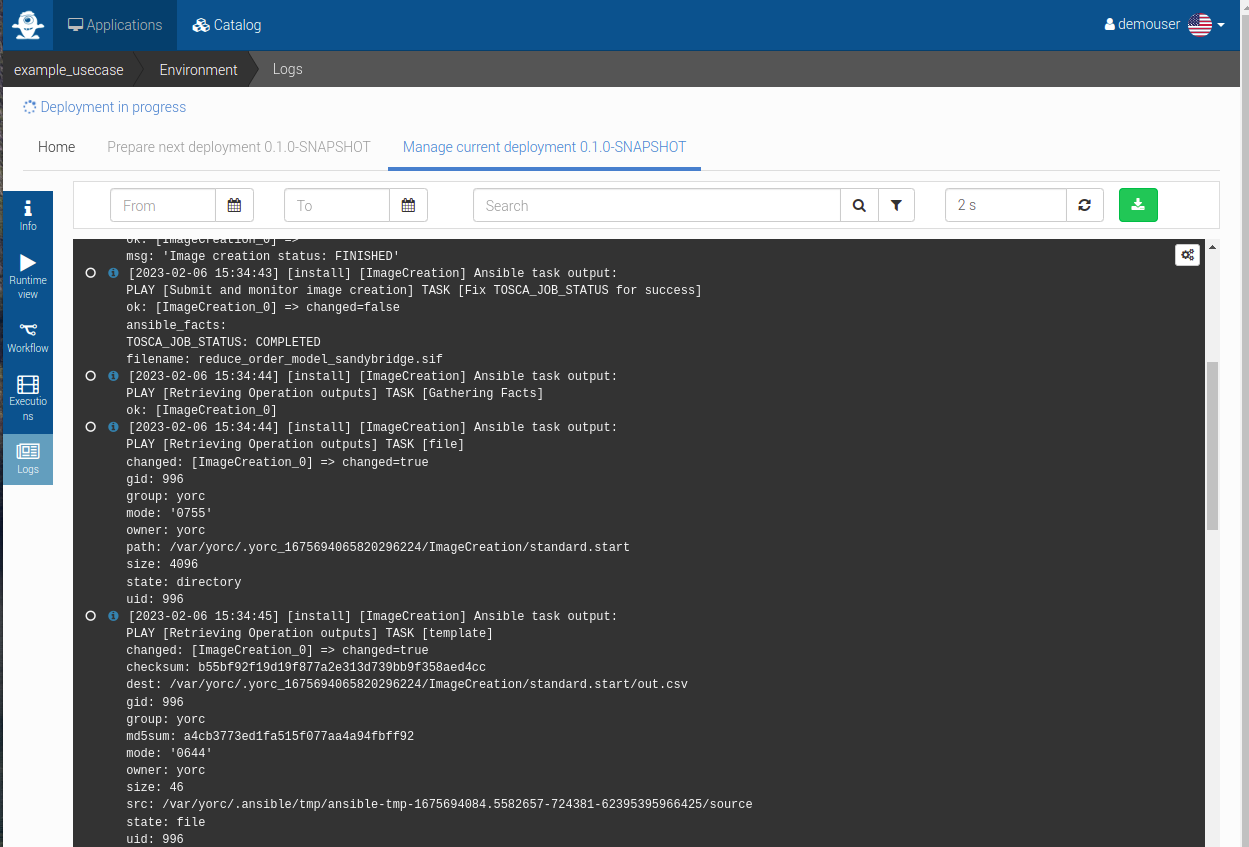
Figure 31 Logs view of a deployment of an application
Wait for the deployment workflow to complete before moving to the next section.
Test a workflow directly from Alien4Cloud
As a workflow developer, it is advisable to perform testing of the workflow prior to making it available to end-users.
This can be achieved directly within Alien4Cloud without the need for additional tools.
To initiate the testing process, navigate to the Workflow tab and select the desired execution workflow from the dropdown menu
(see Figure 32).
Next, provide the necessary inputs for the workflow and initiate the launch by clicking on the Launch button.
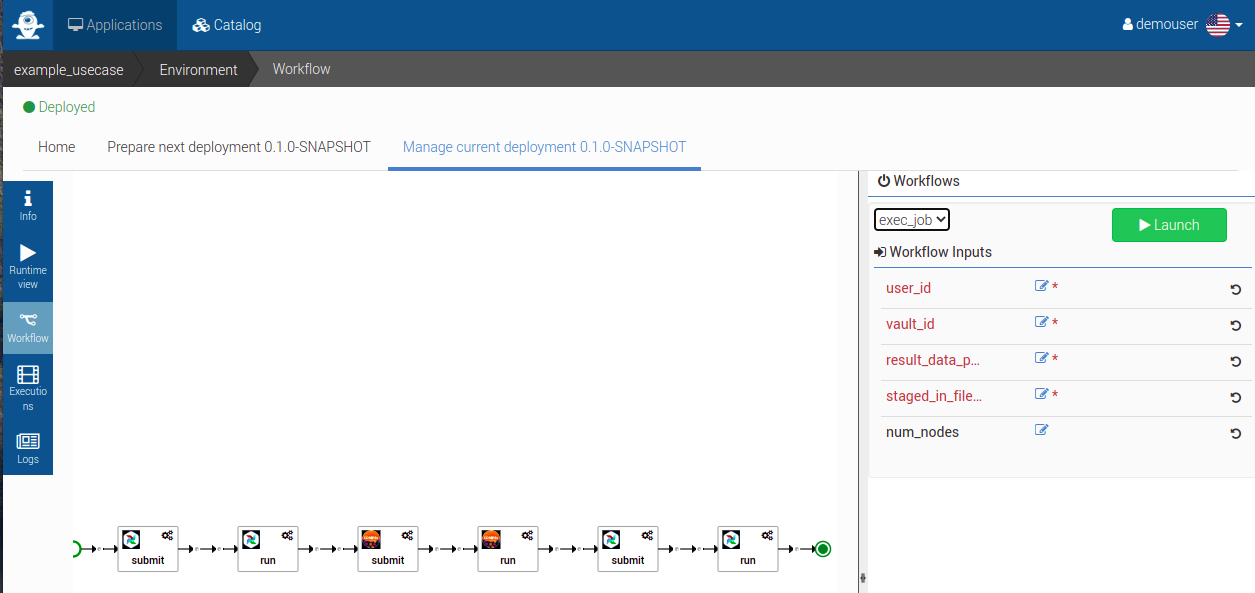
Figure 32 Triggering a workflow for testing purpose
The execution of this workflow can be monitored in a similar manner as previously described in the previous section,
by accessing the Manage current deployment tab and monitoring its progress through the Workflow or Logs tabs.
Expose a workflow to the HPCWaaS API
To expose your application to the HPCWaaS API, navigate to the main page of your application by clicking on its name in the top left corner (see Figure 33).

Figure 33 Back to application’s main page
Utilize the Tags section to configure the interaction between your application and the HPCWaaS API (see Figure 34).
The following tags are recognized by the HPCWaaS API:
hpcwaas-workflowsrepresents a list of comma-separated workflows names from your application that should be made available to the API.hpcwaas-authorized-usersrefers to a list of comma-separated users who are authorized to utilize this workflow. If this tag is not specified, all authenticated users will have access to the workflow.
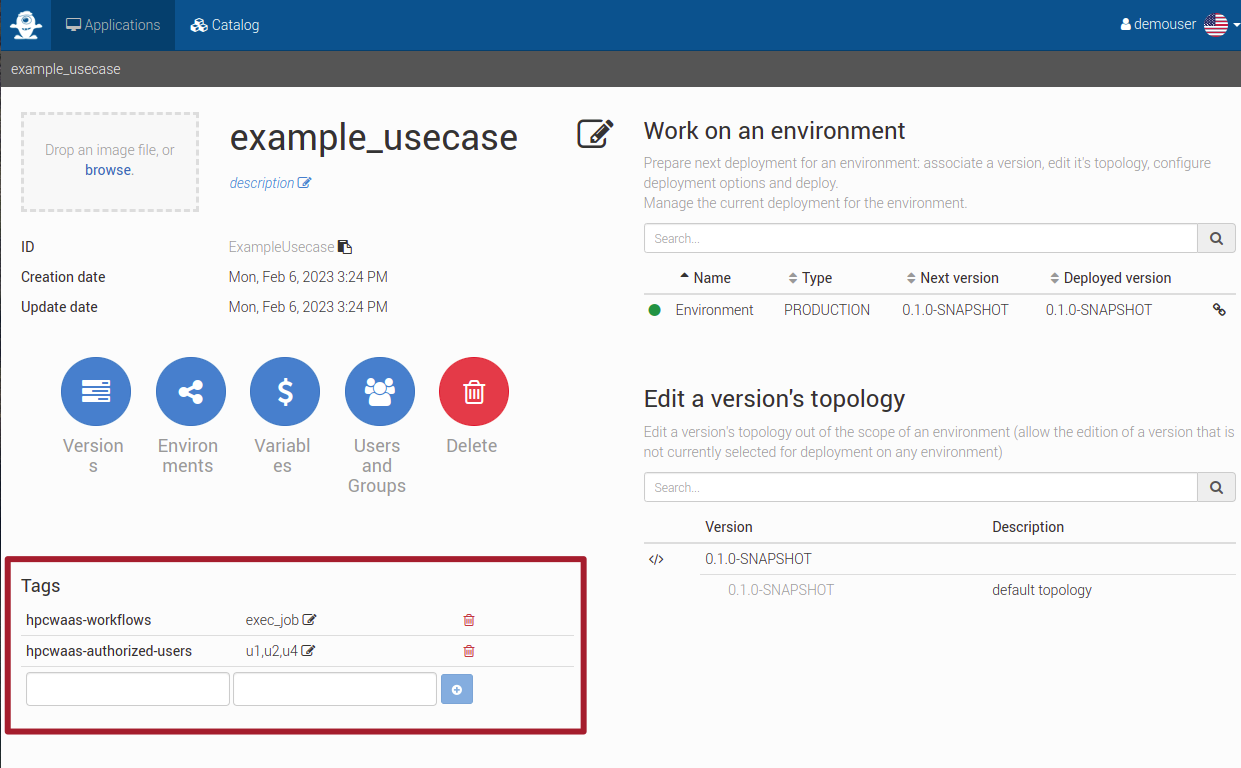
Figure 34 Configure application tags